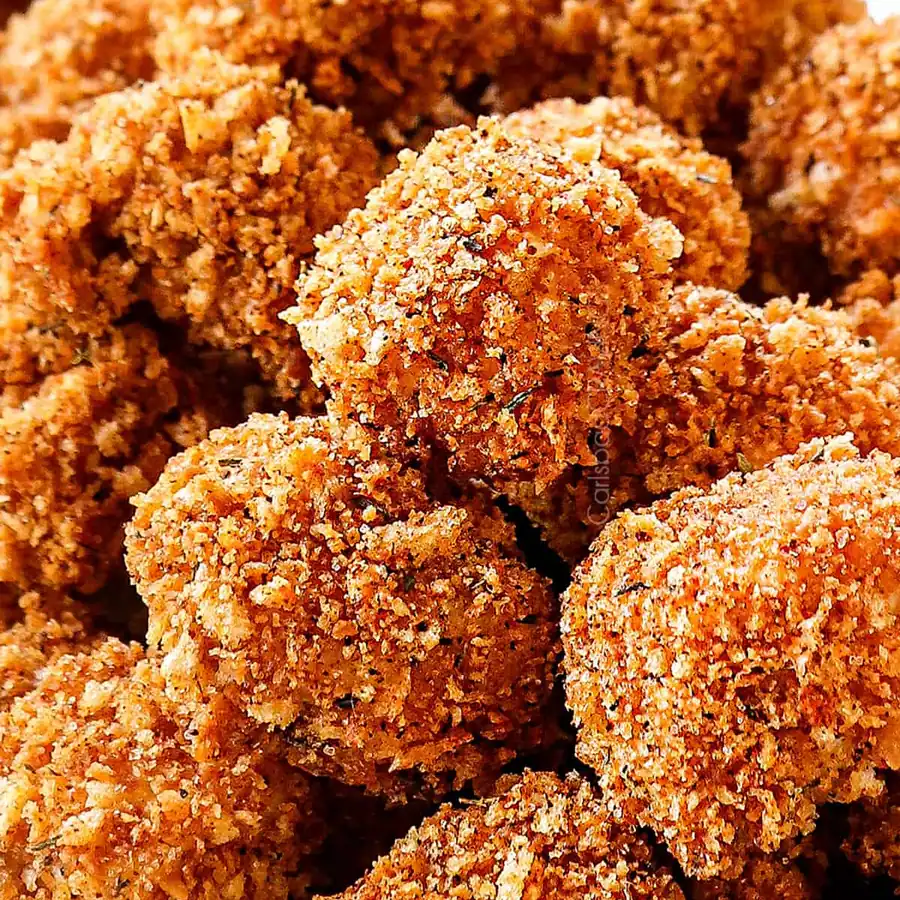
Homemade Chicken Nuggets that are juicy, mega crunchy and exploding with flavor plus they’re Baked, not fried so they’re better for you!
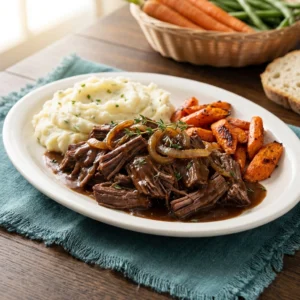
This chicken nugget recipe is life changing! It’s the BEST way to devour crispy chicken nuggets without any of the guilt plus it’s simple, easy and made with pantry friendly ingredients. To make homemade chicken nuggets, the bite-size chicken is briefly marinated in buttermilk, breaded in seasoned, toasted panko then baked to golden perfection that’s so crunchy you won’t believe they’re not fried! These homemade chicken nuggets make a fun snack or an easy weeknight dinner dunked in honey mustard, ketchup, BBQ sauce or ranch alongside mashed potatoes or mac and cheese and a salad. You can also prep the chicken nuggets ahead of time and just bake when ready OR freeze for later so you’re ready for whenever those crunchy cravings strike!
the secrets to the best chicken nugget recipe
Raise your hand if you love chicken nuggets! What about baked chicken nuggets? All too often baked chicken nuggets are lacking in juiciness or crunch – not this recipe! For this chicken nugget recipe, I wanted to bring you a baked version that is still addictingly juicy, crunchy and flavorful – so much so you won’t even be able to tell they’re fried. In fact, my husband exclaimed “these are so crunchy, they taste fried!” Mission accomplished. Here’s why this recipe works:
Chicken nuggets are a worldwide phenomenon – a favorite from kids to adults of all ages. Chicken nuggets are made of small pieces of chicken that is breaded then deep fried or baked. Chicken nuggets are not only are a staple at fast food joints but in the frozen aisle of every grocery store and in various shapes from boots to dinosaurs!
Chicken nuggets were invented in the 1950s by a food science professor at Cornell University, Robert Baker. Baker his work as the “Chicken Crispie,” as an answer to the meat industry’s dilemma of not being able to hold ground meat together. To solve this, the chicken was first treated with vinegar, salt, grains and milk powder and then battered and fried. Today, ingredients and production methods vary between manufacturers, so if you really want to know what’s in your chicken nuggets – make this homemade chicken nuggets recipe!
Essentially, popcorn chicken is smaller and crispier than chicken nuggets. If you are dining out, some chicken nuggets are not specific poultry parts but rather, a smorgasbord of poultry parts processed together – so consume at your own risk! Popcorn chicken, however, is widely understood to be white breast meat. Of course, this homemade chicken nugget recipe is also made of chicken breasts without any mystery ingredients.
Homemade chicken nuggets are so much easier to make than you might think! The chicken is first marinated in buttermilk to tenderize the meat, then it’s coated in a seasoned panko mixture for tons of flavor.
Can I use Chicken Thighs?
I recommend chicken breasts for chicken nuggets, but in the end, it comes down to personal preference. The breasts will emerge buttery tender from the buttermilk bath, deliver the characteristic flavor of chicken nuggets and are easier to cut into uniform pieces than thighs. If you only have thighs on hand during, you can certainly use them, but be aware the pieces will be thinner so watch the baking time.
What Can I Use a DIY Buttermilk Substitute?
If you do not have any buttermilk on hand, don’t worry, I rarely do! You can make DIY buttermilk (or sour milk) for this recipe by adding 2 tablespoons of white vinegar or lemon juice to a measuring glass. Add enough milk (not nonfat) to equal 2 cups. Give it a stir and let sit 5-10 minutes in order to activate and slightly curdle.
This chicken nuggets recipe is easy to make gluten free! Use your favorite gluten free flour such as Bob Red’s Mill Baking Flour and gluten free panko. Gluten free panko should be relatively easy to find. My husband accidently picked up Aleia’s Gluten-Free Panko made of rice and potato flour (among other ingredients), and it was fantastic!
Yes! Swap the buttermilk for your favorite non-dairy milk plus 2 tablespoons white vinegar or lemon juice.
Can I Use Traditional Bread Crumbs?
Technically yes, but traditional breadcrumb won’t delivery crispy chicken nuggets. Please do NOT substitute with traditional breadcrumbs and expect the same crunchy results. For the BEST baked chicken nuggets, stick with panko bread crumbs.
Recipe Variations to Try
Homemade chicken nuggets are so easy to make, but they do require some specific techniques. Here are the basic steps to making baked chicken nuggets in the oven followed and tricks:
Step 1: Marinate chicken. Add the buttermilk to a large freezer bag or a bowl. Stir in the chicken pieces. Let that stand at room temperature for 30 minutes to give the chicken time to tenderize.
Step 2: Toast panko. While the chicken marinates, make the panko coating. Pour the panko breadcrumbs onto a baking sheet, spray with cooking spray or toss with olive oil, and toast at 400 degrees F for about 5 minutes, or until golden brown. Transfer the toasted panko to a large bowl, then stir in the spices.
Step 3: Batter chicken. Make the batter flour, eggs and mayonnaise together in a large bowl. Strain chicken from buttermilk using a slotted spoon or strainer and add to the batter and stir to evenly coat.
Step 4: Bread chicken. Use a spider strainer or slotted spoon to scoop up some chicken and shake to remove excess batter. Using your fingers, transfer chicken to panko so the pieces aren’t touching. Scoop panko over chicken with a clean hand, then press the panko into the chicken. Transfer chicken to prepared baking tray so they aren’t touching. Repeat with remaining chicken.
Step 5: Bake chicken. Bake at 400 degrees F until cooked through. Serve with your favorite dipping sauces and dig in!
If you plan ahead, it is best to marinate your chicken the morning you are going to make your homemade chicken nuggets — this will create the juiciest, melt-in-your mouth chicken. The absolute minimum of marinating should be 30 minutes at room temperature, which will still produce delicious chicken because the chicken is so small. To that end, don’t marinate longer than 12 hours or the chicken will turn to mush.
These homemade chicken nuggets need to bake for roughly 12 to 16 minutes at 400 degrees F. You’ll know they’re done when they’re completely white inside and the internal temperature reaches 165 degrees F. Don’t overbake or they won’t be as juicy.
If you don’t have a wire rack, then line the baking sheet with lightly greased foil and place it in the oven to get nice and hot while you prep the chicken. Take care when adding your chicken because your pan will be HOT! Flip the chicken over halfway through baking with tongs.
CAN YOU DOUBLE THIS RECIPE?
Yes! Whether you’re looking to feed a crowd or freeze some chicken nuggets for later, this recipe is easy to double, triple or quadruple! You’ll simply need to cook the chicken in batches.
I prefer the oven over the air fryer for this homemade chicken nugget recipe because baked chicken nuggets are still crazy crispy and can all be baked in one batch whereas it takes several batches to cook chicken nuggets in the air fryer. The air fryer is fantastic, however, to reheat leftovers.
To make chicken nuggets in the air fryer:
•Spray the air fryer basket with nonstick spray. Preheat air fryer at 400 degrees F for 8-10 minutes.
•Place prepared chicken nuggets in a single layer in the basket without touching, don’t overcrowd.
•Air fry at 400°F for 7-9 minutes or until golden. You can air fry without flipping them over, but for best results, flip halfway through cooking with tongs. Please note Air fryer models can vary in so watch the first batch closely and adjust the time accordingly.
These healthier chicken nuggets are delicious as is, but I think we can all agree these babies taste even better when slathered in BBQ sauce or honey mustard! A few of my favorite sauces and dips to serve with these baked chicken nuggets are:
BBQ sauce
Avocado Ranch
•Ranch
•Honey mustard sauce
•Sweet and sour sauce
•Honey buffalo dip
•Ketchup
Here is how to make a few of our favs:
SWEET AND SOUR SAUCE
Sweet and Sour Sauce might not be what you immediately think of for dipping chicken nuggets -but it is AMAZING and SO easy! This Sweet and Sour Sauce recipe is simpler than those served with Egg rolls, rangoons, etc. with a less Asian flair because it doesn’t contain soy sauce or pineapple juice. To make, combine the following in a small saucepan:
- Whisk until the sugar and cornstarch have dissolved.
- Heat over medium, while often, until it begins to simmer. Simmer until thickened to desired consistency.
HONEY MUSTARD DIP
Honey Mustard Dip is creamy, sweet and tangy with a light kick. To make, whisk together:
HONEY BUFFALO DIP
Honey Buffalo Dip is creamy, slightly sweet and as spicy as you want it. To make, whisk together:
HONEY BBQ DIP
Honey BBQ Dip is sweet and tangy and you can add hot sauce to spice it up if you wish. To make, combine the following in a small saucepan over medium heat, until it begins to simmer; simmer until thickened to desired consistency.
Can I Prep This Recipe in Advance?
Yes! You can prepare the individual components of this baked chicken nugget recipe in advance.
Chicken: Chop into 1-inch cubes, soak in the buttermilk for up to 12 hours in advance. Do NOT soak longer than 12 hours, otherwise the chicken will turn to mush.
Panko coating: Toast the panko breadcrumbs, then mix together with the spices. Store in an airtight container until ready to use.
Bread chicken: Batter and bread the chicken and spread on greased baking rack. Cover with foil and refrigerate. Uncover and let stand for 30 minutes at room temperature before baking. Note this method will produce ever so slightly less crispy chicken nuggets.
Entire recipe: You can also make the entire recipe as written, let the chicken nuggets cool, then freeze for up to 3 months. I’ve given freezing instructions below.

Homemade chicken nuggets should be stored in an airtight container in the refrigerator. When properly stored, they’re good for 3 to 5 days. For best results, don’t stack your chicken directly on top of each other as this will make the breading soft. Instead, place a piece of parchment paper in between the layers.
Microwave: The chicken won’t be nearly as crispy if reheated in the microwave, but it will still be flavorful. Transfer chicken to a microwave-safe plate in an even layer. Microwave for 60 seconds, then in additional increments of 15 seconds as needed.
Air fryer: Place chicken in a single layer in the basket without touching. Air fry using the “snack” setting for 4-6 minutes, checking at 4 minutes to ensure the chicken doesn’t burn.
Oven: Spread chicken on a lightly greased baking rack set in a baking sheet. Bake at 325 degrees F for 10 minutes or until heated through.
Yes! Chicken nuggets freeze extremely well for a hassle-free snack, appetizer, lunch or dinner.
To freeze:
1. Bake chicken according to directions then let cool to room temperature.
2. Transfer the entire baking sheet to the freezer.
3. Let the chicken freeze for 1-2 hours or until the chicken is solid. This prevents the chicken from clumping together.
4. Add chicken to a freezer bag, squeeze out excess air, and label.
5. Freeze for up to 3 months.
6. Bake chicken nuggets straight from frozen (so they don’t become soggy) on a lightly greased baking rack placed over a baking sheet at 425 degrees for 15 minutes, or until heated through.
FOR THE OREO CRUST:

Chicken Nuggets
- Total Time: 52 minutes
- Yield: 6 1x
Description
This chicken nugget recipe is life changing! It’s the BEST way to devour crispy chicken nuggets without any of the guilt plus it’s simple, easy and made with pantry friendly ingredients. To make homemade chicken nuggets, the bite-size chicken is briefly marinated in buttermilk, breaded in seasoned, toasted panko then baked to golden perfection that’s so crunchy you won’t believe they’re not fried! These homemade chicken nuggets make a fun snack or an easy weeknight dinner dunked in honey mustard, ketchup, BBQ sauce or ranch alongside mashed potatoes or mac and cheese and a salad. You can also prep the chicken nuggets ahead of time and just bake when ready OR freeze for later so you’re ready for whenever those crunchy cravings strike!
Ingredients
- 1 1/2 pounds boneless skinless chicken breasts (cut into 1-inch cubes)
- 2 cups buttermilk (or DIY in notes*)
- Cooking spray
- 2 cups panko breadcrumbs
- 1 1/2 tsp EACH chili powder, paprika
- 1 tsp EACH onion powder, dried thyme, salt, pepper
- 1/2 teaspoon garlic powder
- 1/4 teaspoon cayenne pepper
- 2 eggs
- 1/4 cup flour
- 2 tablespoons mayonnaise
Instructions
- Add buttermilk and chicken to a freezer bag or bowl. Let chicken marinate at room temperature for 30 minutes or refrigerate up to 12 hours. Meanwhile, toast panko.
- Preheat oven to 400 degrees F. Spread panko into an even onto a baking sheet and spray generously with cooking spray (spray at an angle so the panko doesn’t fly everywhere); toss with your hands, then spray again. Spread panko into an even layer (wiggle baking sheet to level as needed).
- Bake at 400 degrees F for 3 – 5 minutes (check at 3 minutes) until golden. Remove from the oven and stir in all panko breading spices; set aside.
- Set a wire rack over a second baking sheet; spray the rack with cooking spray; set aside.
- Whisk the Batter ingredients together in a large bowl. Strain chicken from buttermilk using a slotted spoon or strainer and add to the batter and stir to evenly coat.
- Use a spider strainer or slotted spoon to scoop up some chicken and shake to remove excess batter. Using your fingers, transfer chicken from strainer to panko so the pieces aren’t touching. Scoop panko over chicken with a clean hand, then press the panko into the chicken. Transfer chicken to prepared baking tray so they aren’t touching. Repeat with remaining chicken.
- Bake chicken at 400 degrees F for 12-16 minutes or until cooked through (temperature registers 165 degrees F with a meat thermometer). Serve with BBQ sauce, honey mustard, ranch, ketchup, sweet and sour sauce etc.
- Prep Time: 40 minutes
- Cook Time: 12 minutes